How to Press Out a Lower Ball Joint (Torque Specs and Tips)

Replacing a lower ball joint is one of the most critical tasks in maintaining your vehicle’s suspension system. The ball joint connects your vehicle’s control arms to the steering knuckles, allowing smooth movement and steering.
Over time, these joints wear out, leading to clunking noises, uneven tire wear, and compromised handling. Whether you are a DIYer or a professional mechanic, knowing how to press out and replace a lower ball joint is essential to keep your vehicle running smoothly.
In this blog, we’ll walk you through the step-by-step process of pressing out a lower ball joint and provide you with helpful torque specs and tips to make the job easier.
Tools and Materials You’ll Need:
- Ball joint press kit
- Wrenches and socket set
- Breaker bar
- Torque wrench
- Ball joint separator or pickle fork
- Penetrating oil
- Safety gloves and eye protection
- A replacement lower ball joint
Step-by-Step Guide to Pressing Out a Lower Ball Joint
1. Lift and Secure the Vehicle
Start by safely lifting the vehicle with a jack and securing it with jack stands. Always ensure the vehicle is stable before working underneath it. Remove the wheel to access the lower control arm.
2. Loosen the Ball Joint Components
Next, locate the lower ball joint attached to the control arm and steering knuckle. Apply penetrating oil to the nut and bolts to help loosen them. Use a breaker bar or an impact wrench to loosen the ball joint nut.
3. Remove the Control Arm and Ball Joint Assembly
Detach the lower control arm from the steering knuckle using a ball joint separator or pickle fork. If the ball joint is stubborn, a few light taps with a hammer may help loosen it.
4. Use the Ball Joint Press Kit
With the control arm free, set up your ball joint press kit. Align the press with the ball joint and use the appropriate size adapters to ensure proper pressure. Slowly tighten the press until the ball joint is pushed out of the control arm.
5. Inspect the Control Arm and Replace the Ball Joint
Before pressing in the new ball joint, inspect the control arm for any signs of damage or wear. Once inspected, install the new lower ball joint into the control arm using the ball joint press, being careful to align everything correctly.
Torque Specs for Lower Ball Joints
Each vehicle model has specific torque requirements, so it's essential to follow your vehicle’s repair manual for accurate specs. Typically, the lower ball joint nut should be torqued to around 70-90 ft-lbs, but this can vary. Always double-check for your specific model to avoid under- or over-tightening, which can lead to premature wear or failure.
Tips for a Smooth Installation:
- Use Penetrating Oil: Apply penetrating oil to any rusted or seized parts to make disassembly easier.
- Be Precise with Torque: Always use a torque wrench to tighten fasteners to manufacturer specifications.
- Check for Wear: Inspect the control arms, bushings, and other suspension parts while working. Replacing a worn control arm with the ball joint can save you trouble later.
Benefits of High-Quality Replacement Parts
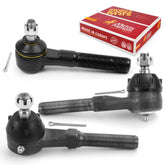
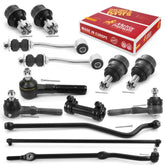
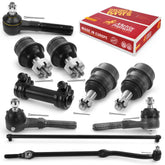
When replacing a critical part like a ball joint, it’s crucial to use high-quality parts for durability and safety. Metrix Premium Chassis Parts offers premium-grade steering, suspension, and brake parts that are built to last. Their ball joints are engineered for a perfect fit and long-lasting performance, ensuring your vehicle operates smoothly after the repair.
Metrix Premium also provides the convenience of fast shipping right to your doorstep, so you have the parts when you need them. Whether you're performing the job yourself or bringing your vehicle to a mechanic, having reliable, high-quality parts can make a big difference in the overall repair process. Our suspension kits are designed for easy installation, making the job quicker for DIYers and professionals alike.
Take Care of Your Suspension for Better Performance
Lower ball joint replacements are a necessary part of vehicle maintenance, especially for those driving on rough roads or with high-mileage cars. Knowing how to press out and replace a ball joint is a valuable skill, whether you’re an experienced DIYer or a professional mechanic.
With regular inspections and timely replacements, you can keep your suspension system in top shape, ensuring a smooth and safe ride. Trusting premium parts from Metrix Premium Chassis Parts will give you peace of mind, knowing your vehicle is equipped with reliable parts for optimal performance.
Follow us on social media and sign up at our website for notifications about new posts and giveaways.
Previous Article: Brake 101: How Rear-Wheel Drive Cars Stop Safely


