DIY Guide: Replacing Stabilizer Bar Links in Simple Steps: A step-by-step guide
Vehicle suspension systems rely on stabilizer bar links, also called sway bar links or anti-roll bar links, to maintain stability and handling during cornering and on bumpy roads. Stabilizer bar links can wear out due to normal use or harsh road conditions. Signs of wear include increased body roll during turns, clunking noise over bumps, or decreased stability. Regular maintenance ensures vehicle stability and safety.
Here's a general guide on how to replace stabilizer bar links:
- Safety First: Park your vehicle on a level surface and engage the parking brake. Use wheel chocks to prevent the vehicle from rolling. If your vehicle has a front-wheel-drive layout, make sure to turn the steering wheel to the opposite side of the one you're working on. For example, if you're working on the passenger side, turn the steering wheel all the way to the left.
- Raise the Vehicle: Use a jack to lift the front of the vehicle and secure it on jack stands. Remove the front wheels using a lug wrench.
- Locate the Stabilizer Bar Links: The stabilizer bar links connect the sway bar to the control arms or struts. They typically have ball joints at each end.
- Remove the Old Stabilizer Bar Links: Depending on your vehicle, you may need to remove additional components to access the stabilizer bar links. Use appropriate wrenches or sockets to remove the nuts or bolts that secure the stabilizer bar links to the control arms or struts. You might need to hold the link steady with one wrench while turning the nut with another. If the nuts/bolts are rusty or stuck, apply penetrating oil and let it sit for a while before attempting to remove them. Remove the old stabilizer bar links.
- Install the New Stabilizer Bar Links: Attach the new stabilizer bar links to the control arms or struts and secure them with the nuts or bolts. Tighten the nuts or bolts to the manufacturer's recommended torque specifications using a torque wrench.
- Reassemble: If you had to remove any additional components to access the stabilizer bar links, reassemble them.
- Lower the Vehicle: Carefully remove the jack stands and lower the vehicle to the ground.
- Tighten and Check: Once the vehicle is back on the ground, use the torque wrench to re-check the tightness of the stabilizer bar link nuts or bolts.
- Wheel Installation: Put the front wheels back on and hand-tighten the lug nuts.
- Final Steps: Lower the vehicle completely and tighten the lug nuts in a crisscross pattern using a lug wrench. Double-check your work and make sure all components are properly tightened.
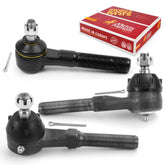
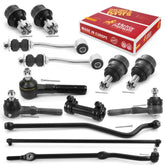
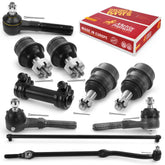
Replacing stabilizer bar links is a relatively straightforward maintenance task that can help improve your vehicle's stability and handling. Stabilizer bar links connect the sway bar to the suspension components. They help control body roll during cornering and enhance overall road handling. For your convenience, stabilizer bar links and all the suspension parts you may need are found on Metrix Premium Chassis Parts. You can visit our website at https://metrixpremiumparts.com.


